
Spilling Strawberries 16x20 oil on linen
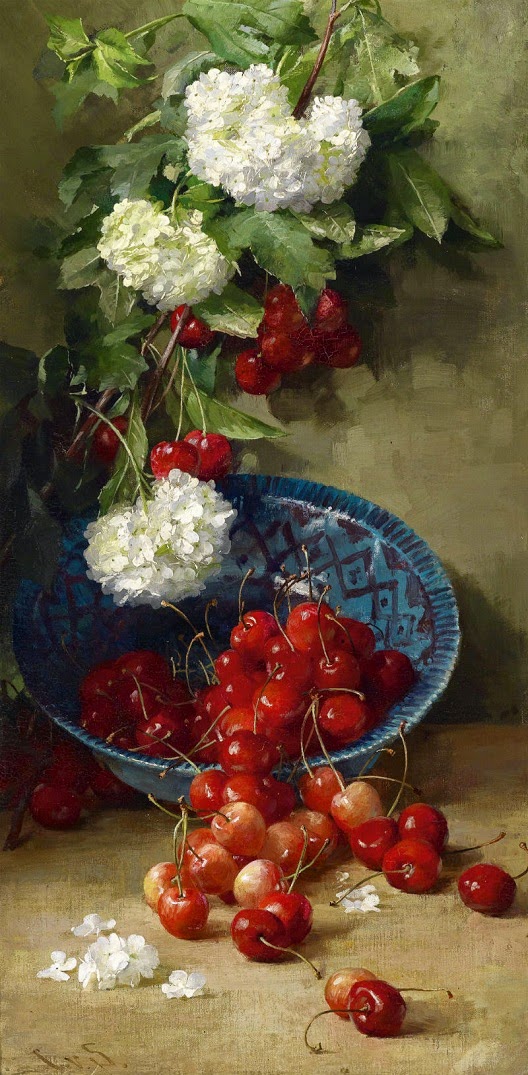
This composition is loosely based on a painting I have admired. I rarely use another artists work for my concept but this is one I've wanted to do for a long time. The artist of the painting I gained inspiration from is Clara Von Sievers. My interpretation is quite different but, the greatest similarity is the flow of the flowers and spilling fruit.
.jpg)
"Clara Von Sievers, Cherries"
I took some progress shots as I was working on this and I know some of you have asked to see the steps. I might have gotten lost in the work and forgotten to take some photos toward the end stages :( oops....but I'll share what I have!
Hope you enjoy them!!

Let's start first with the set up. It is important to get your set up as close to your "vision" as you can. With something as unruly as flowers can be, it may be impossible to get them all turned in just the right direction, just the right placement...etc. AND they like to move around after you start painting anyway!
However, the better my set up the less "thinking" I will have to do once I actually start painting. That being said, once I start painting I will make whatever adjustments I feel I must to create the right flow, design, and harmony. Your painting is what matters, not the group of objects sitting on the table. The more you paint, the better you will get at creating the set up and the better you will get at "winging it", when the set up isn't working quite right in your painting. The visual aid of your set up is just as important as working from life in the landscape, so do spend some time in trying to get it what you want from the start.

Step 1
I do not approach any two paintings in exactly the same way although there are certain things that I will always try to get down as soon as I can. The most important thing to me in this painting was the wonderful "flow" of the design. I wanted movement. So I started with a gestural sketch using thinned ultramarine blue and transparent oxide red, getting the placement of my objects, but more importantly, establishing the movement of my eye throughout the canvas. I also established where my darkest values would be and worked to create a path that I could follow through and around the painting.

Step 2
In this second stage I have started introducing my colors. I like to create a level of value study with my colors, typically working dark to light.....I will wipe out areas of paint to lighten my value and leave the areas where I want my purest color with the white of the linen. Because I work a lot with transparent pigments, the brightness of the linen is critical to getting the clean intense colors at my focal point. I use very little (maybe none) white at this point because that adds opacity and immediately starts to dull the intensity of the pure pigment. I want these transparent background and shadow areas to show interest and depth...I don't want them to appear flat or dull.

Step 3
I continue to build my color...going somewhat from background and moving forward. I still work the same technique as in step 2 but I have started pushing the brighter colors and lighter values of my foreground and point of interest. As I start to model and shape the flowers and objects I gradually introduce some more opaque pigments as well as adding white to create opacity in lighter areas. While the painting is a long way from finished at this point the process is really just a continuation of more of the same. Adding opaque passages, wiping away areas of transparency. Keeping control of my values, and my intensity of color. Those are the greatest tools you have in your pocket to create depth and interest in your painting. Practice them...push them.
I wish I had a step 4. I would like to spend a little more time showing the build up in the opaque areas....alas, not this time as the camera was forgotten and the painting became my reality for a while....:)
Hope you enjoyed this and I hope that it may have given you some instruction that you can use!
Happy painting!
What a wonderful commentary on how you approach your paintings,Barbara. It
ReplyDeletewas fun reading about your progress. The end result is fabulous.
I do so appreciate hearing from you Gene...love to share with another artist!
ReplyDelete